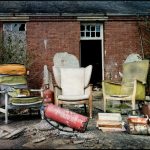
Another old photo from Hellingly, shot in April 2009, no less than the fifth UrbEx photo I ever took!
It looks a bit HDR-ish to me, but this is in fact one photograph, although with several adjustment layers. The first was a tone curve to give medium contrast, the second was a black to white gradient map to darken the image and add some “grittiness” to the original shot, which was taken in quite bright sunlight and therefore a little flat. Next I added a texture layer with the blending mode set to Multiply, finally a brightness/contrast layer with the Brightness turned up to +39. Textures can often make an image quite dark, which is easily counteracted by brightening (the amount required depends on just how dark the texture is. It is possible to lower the opacity of a texture layer, but this often loses some of the fine details that make it interesting). I always add a layer mask to texture layers and also to the Gradient Map, so that I can selectively paint in or out (black or white brushes respectively) the effect until I am happy with the final image. For me, this is where the real “art” comes in, as I am painting with a virtual brush (using my lovely new Wacom tablet and pen), enhancing some areas or knocking back others to create the look that you see above. I love working like this, and it is incredibly satisfying for me to finally be doing something creative after so many years without – happy days!


Most excellent, Viveca! Love the image and your blog post today!
Great shot! Thanks for describing how you accomplished this.